boundary
Options: <json>
GeoJSON polygon limiting the area of the reconstruction. Can be specified either as path to a GeoJSON file or as a JSON string representing the contents of a GeoJSON file. Default: ``
GeoJSON{}nullnullResource |
Impact |
|---|---|
CPU |
●●○ | Medium |
GPU |
○○○ | None |
HDD |
○○○ | None |
RAM |
●○○ | Low |
Time |
●●○ | Medium |
What is Boundary [GeoJSON]?
The --boundary argument serves to constrain and "crop" all final output products of a processing task to the bounding box created by the GeoJSON string that is passed to the --boundary argument.
When is Boundary [GeoJSON] appropriate?
Passing a --boundary GeoJSON is appropriate in any instance where one would want a specific subset of the entire reconstruction area.
If you are interested in the complete reconstruction, the --auto-boundary option would likely be more appropriate.
Further, given that the --boundary is applied after the products are generated (and thereby modifying them), it adds processing time to the dataset, and may not be appropriate if one's primary concern is generating a complete product as fast as possible.
Why would one use Boundary [GeoJSON]?
One might want to use the --boundary function to limit the final products to a predefined Area Of Interest (AOI).
As an example, you are tasked to survey a given property/lot. You decide to include 20m of overfly in your survey so that the reconstruction is clean and with sufficient overlap right up to the property boundaries. However, due to this overfly and your flight height you also capture and reconstruct bordering properties and homes that are not part of your survey AOI. Using a GeoJSON representation of the AOI property's boundary, you would then "clip" all of the final products to be just what is inside the GeoJSON boundary, providing you with a clean, focused, and "safe" representation of the survey AOI (and nothing beyond it).
How would one create Boundary [GeoJSON]?
GeoJSON.io
- http://geojson.io
A quick, simple webapp for creating GeoJSON files.
New GeoJSON
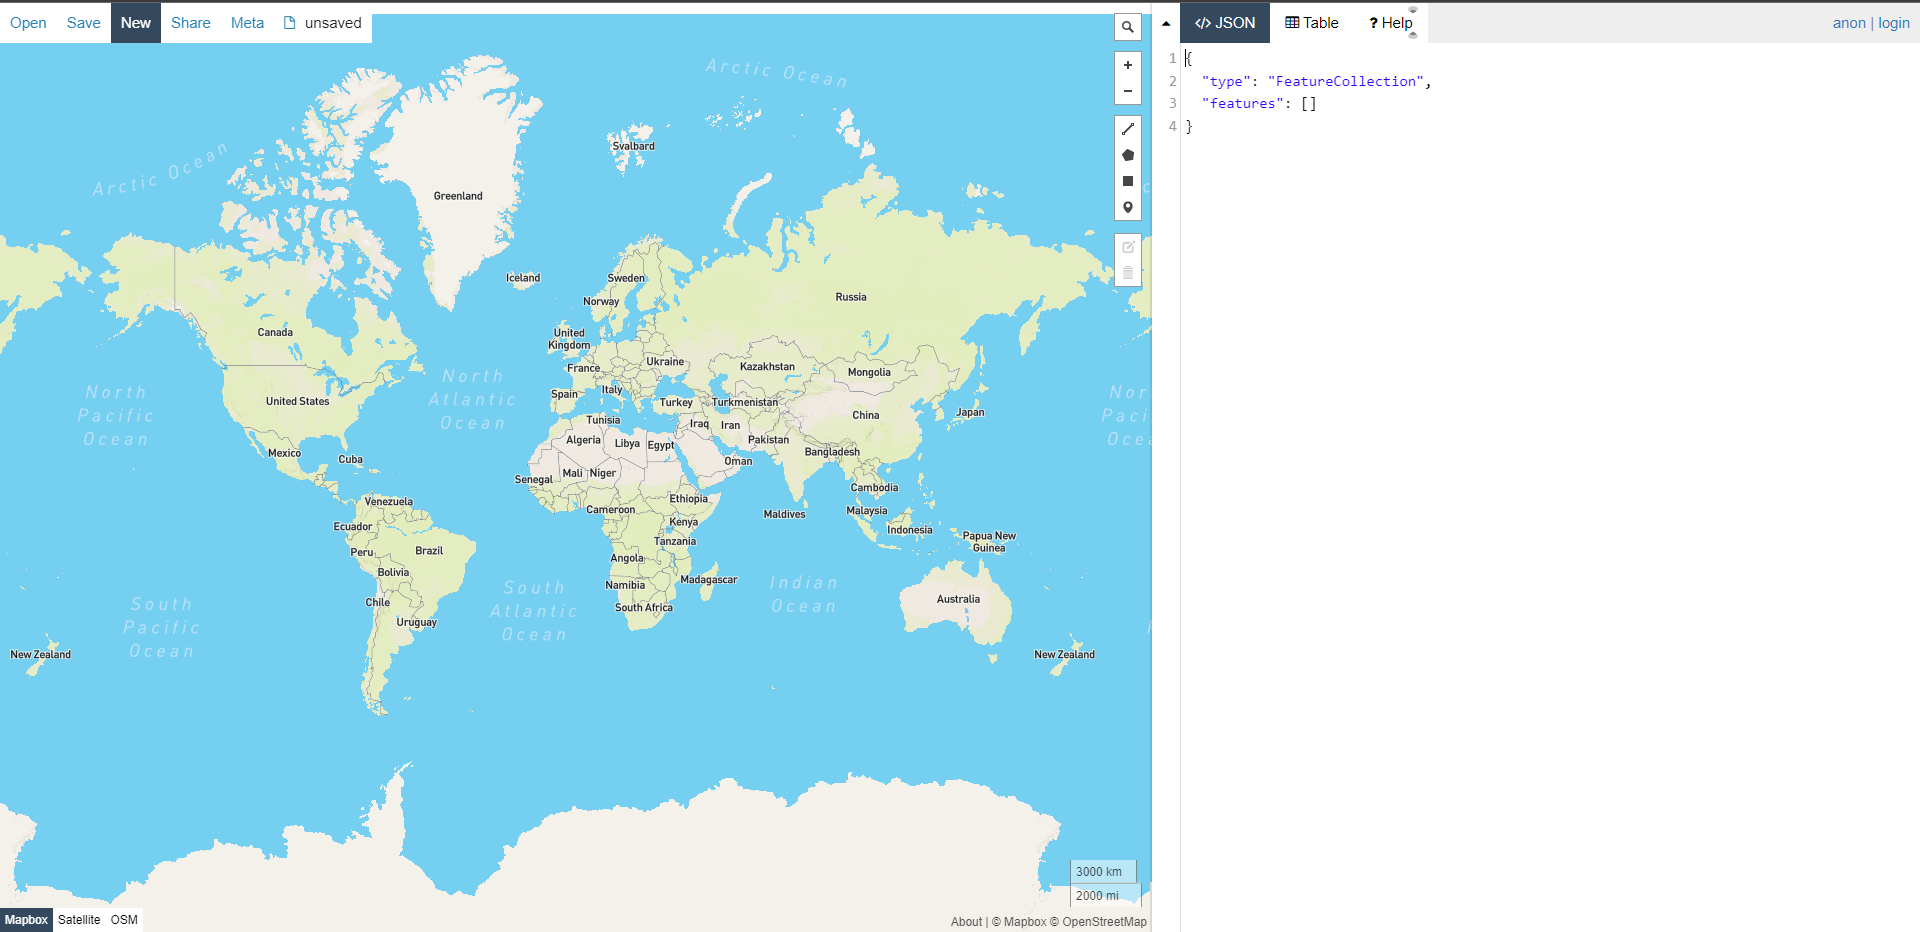
After opening the above link to GeoJSON.io, one should pan and zoom the map preview to find their area of interest.
Creating A Polygon
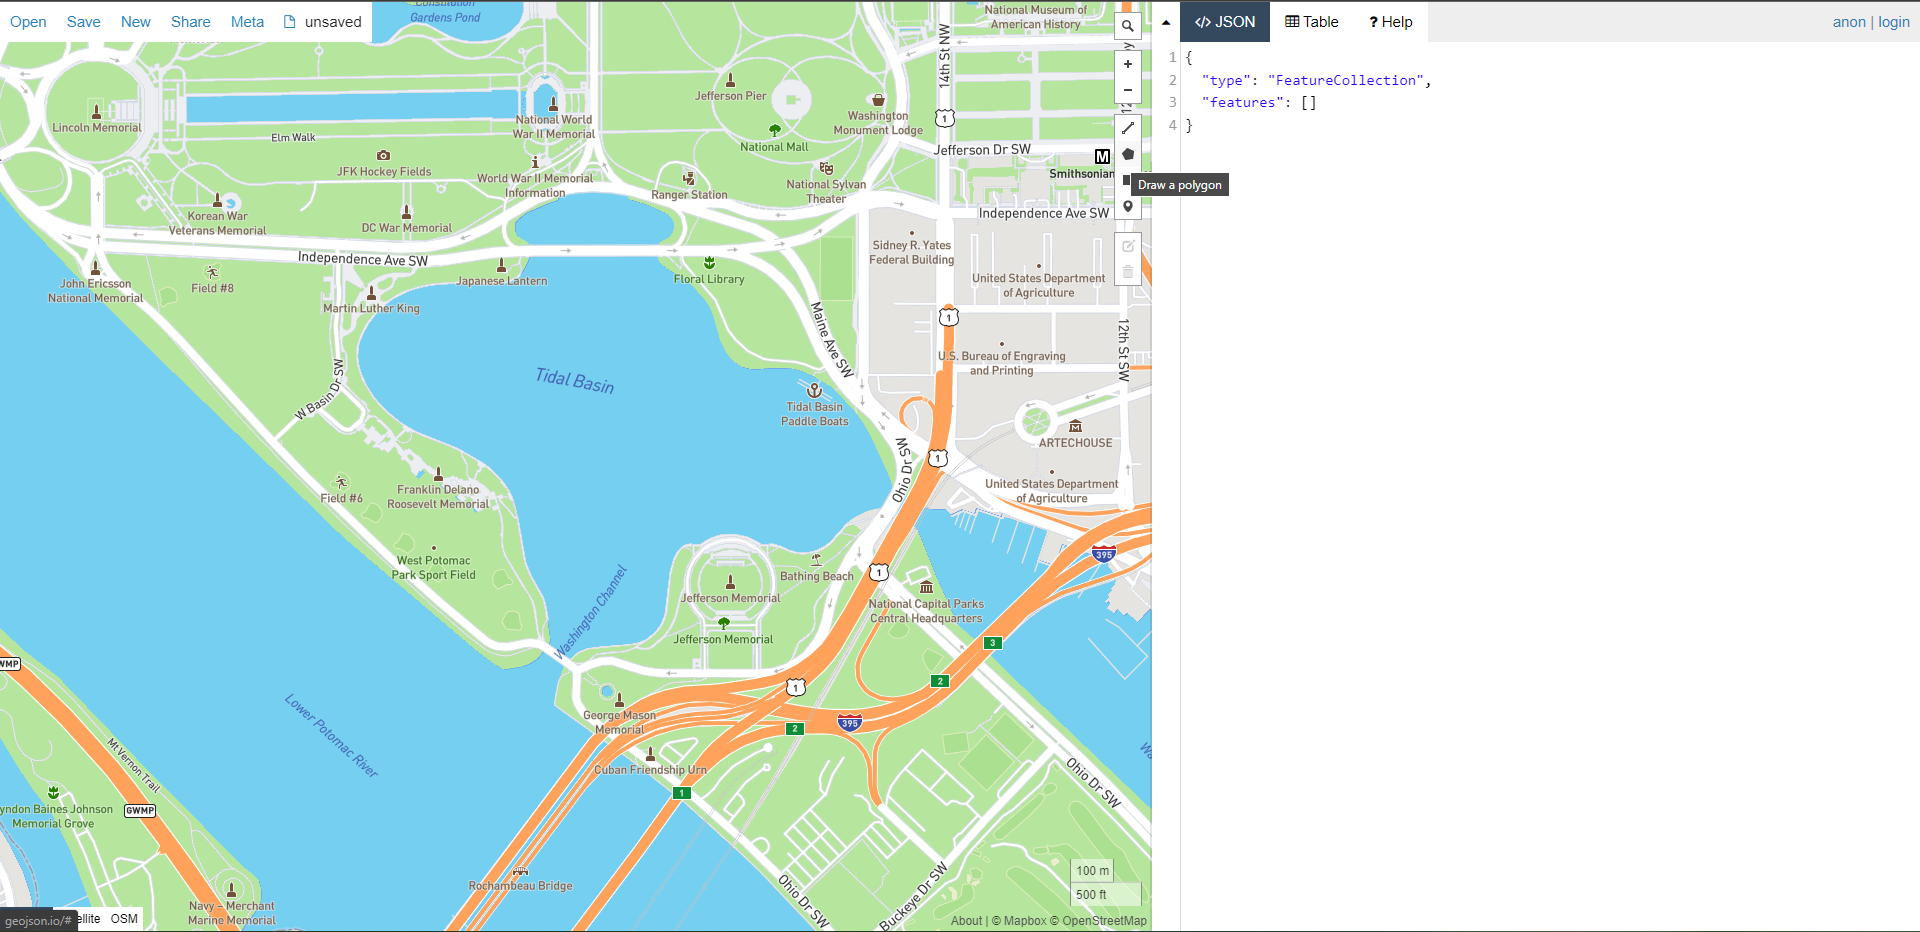
Selecting the "Draw Polygon" menu option will allow you to place verticies for your polygon by left-clicking on the map.
Placing Verticies
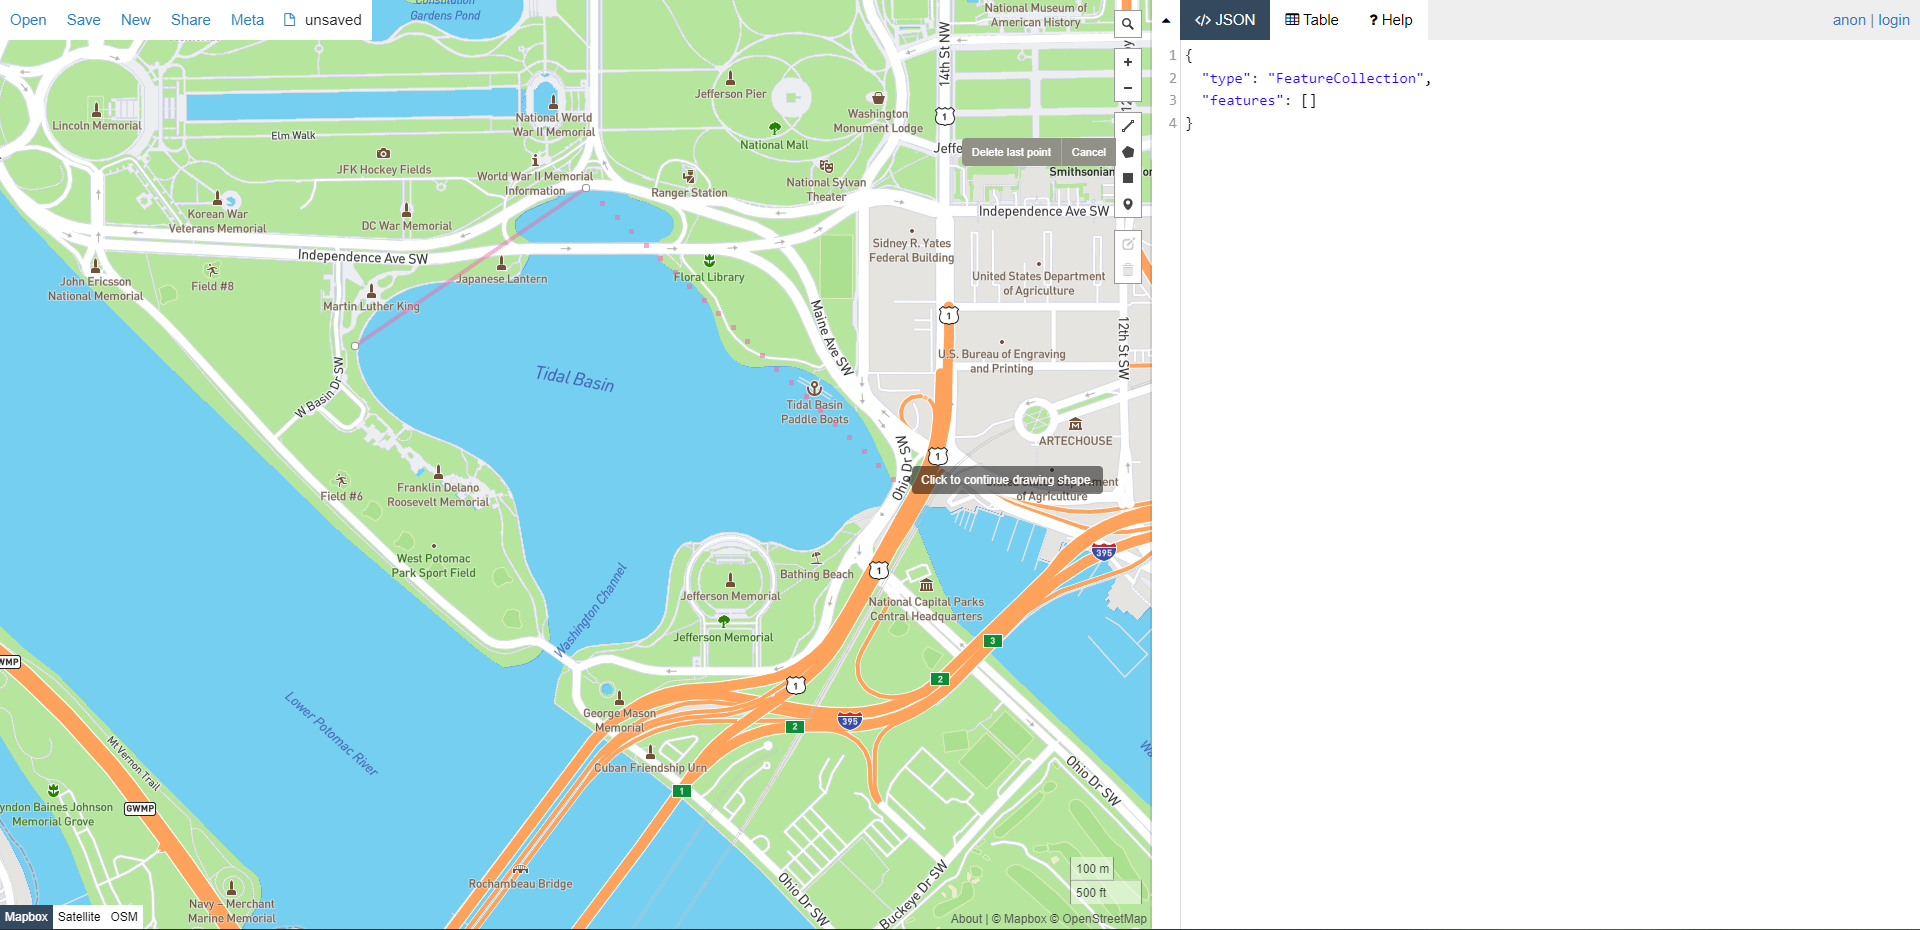
Choose the appropriate locations of the boundary of your polygon by left-clicking on the map to place a vertex. You can place as many vertices as you require.
Completing A Polygon
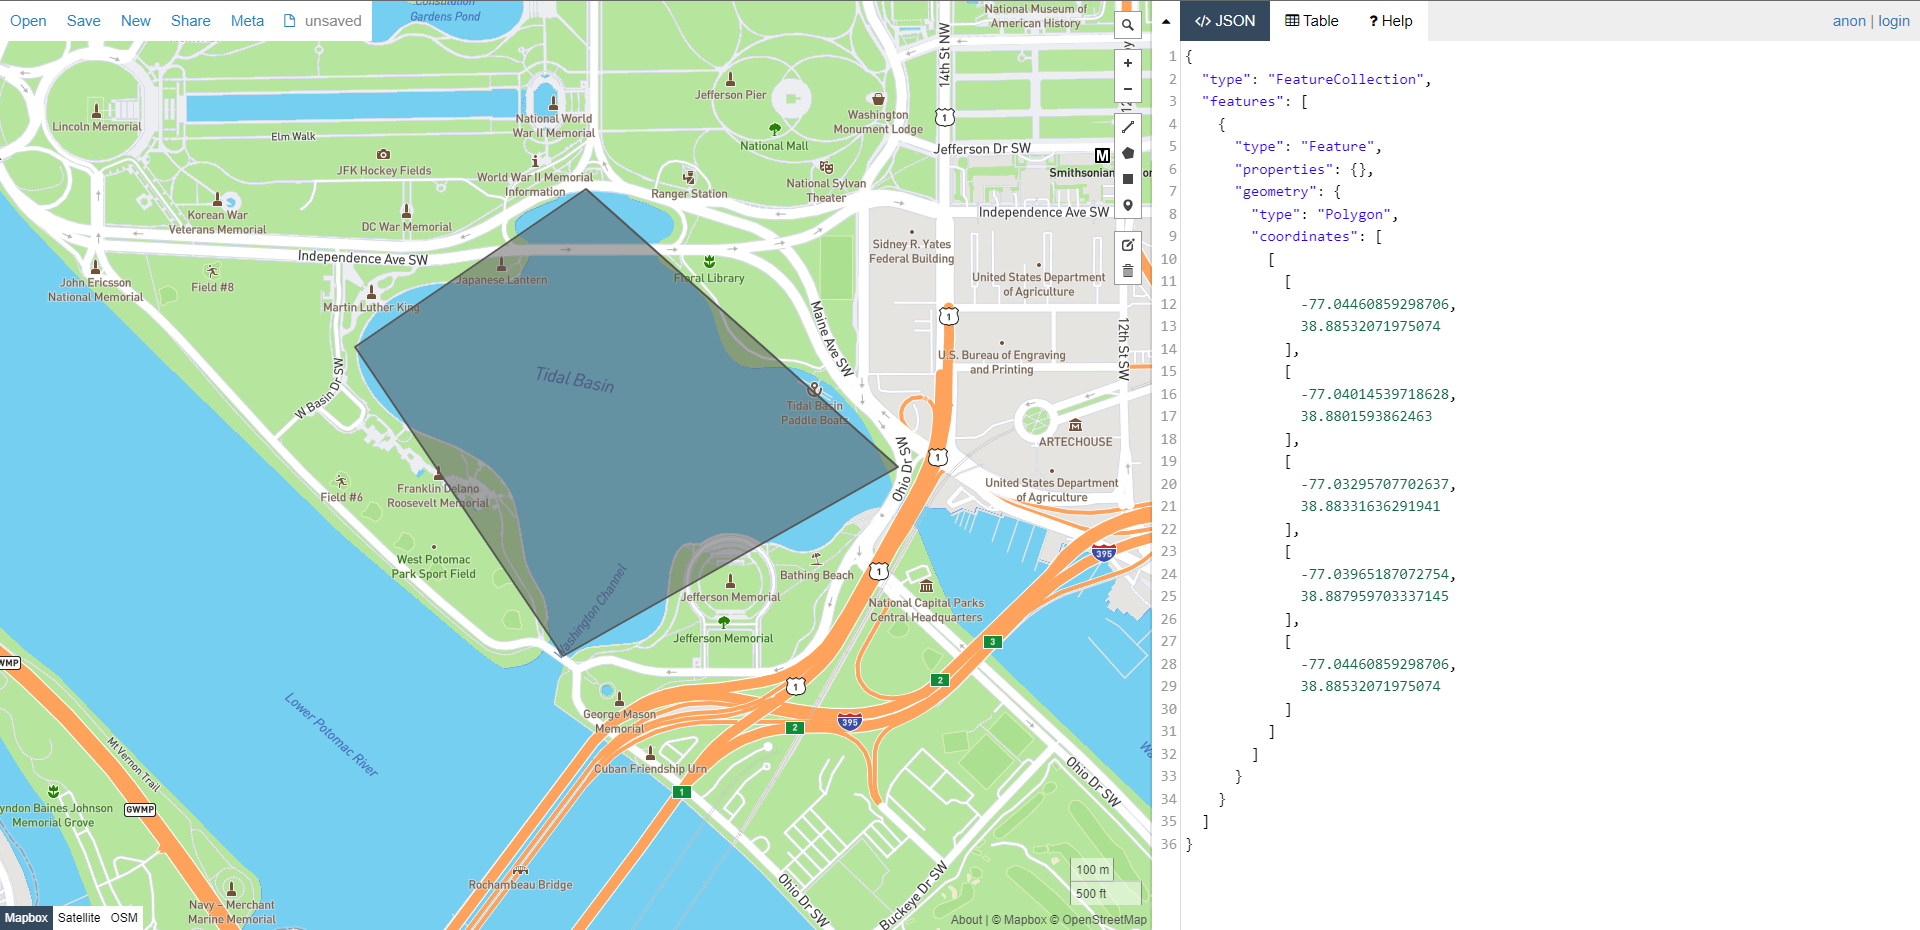
To close the polygon, you left-click on your first vertex. You will be able to close your polygon once you have placed at least three vertices on the map. A completed polygon will have a different representation than one that is in-progress. It will have a darker border and a fill, implying that it is now a "solid" polygon. If your polygon looks like this, you are ready to save it.
Saving A Polygon
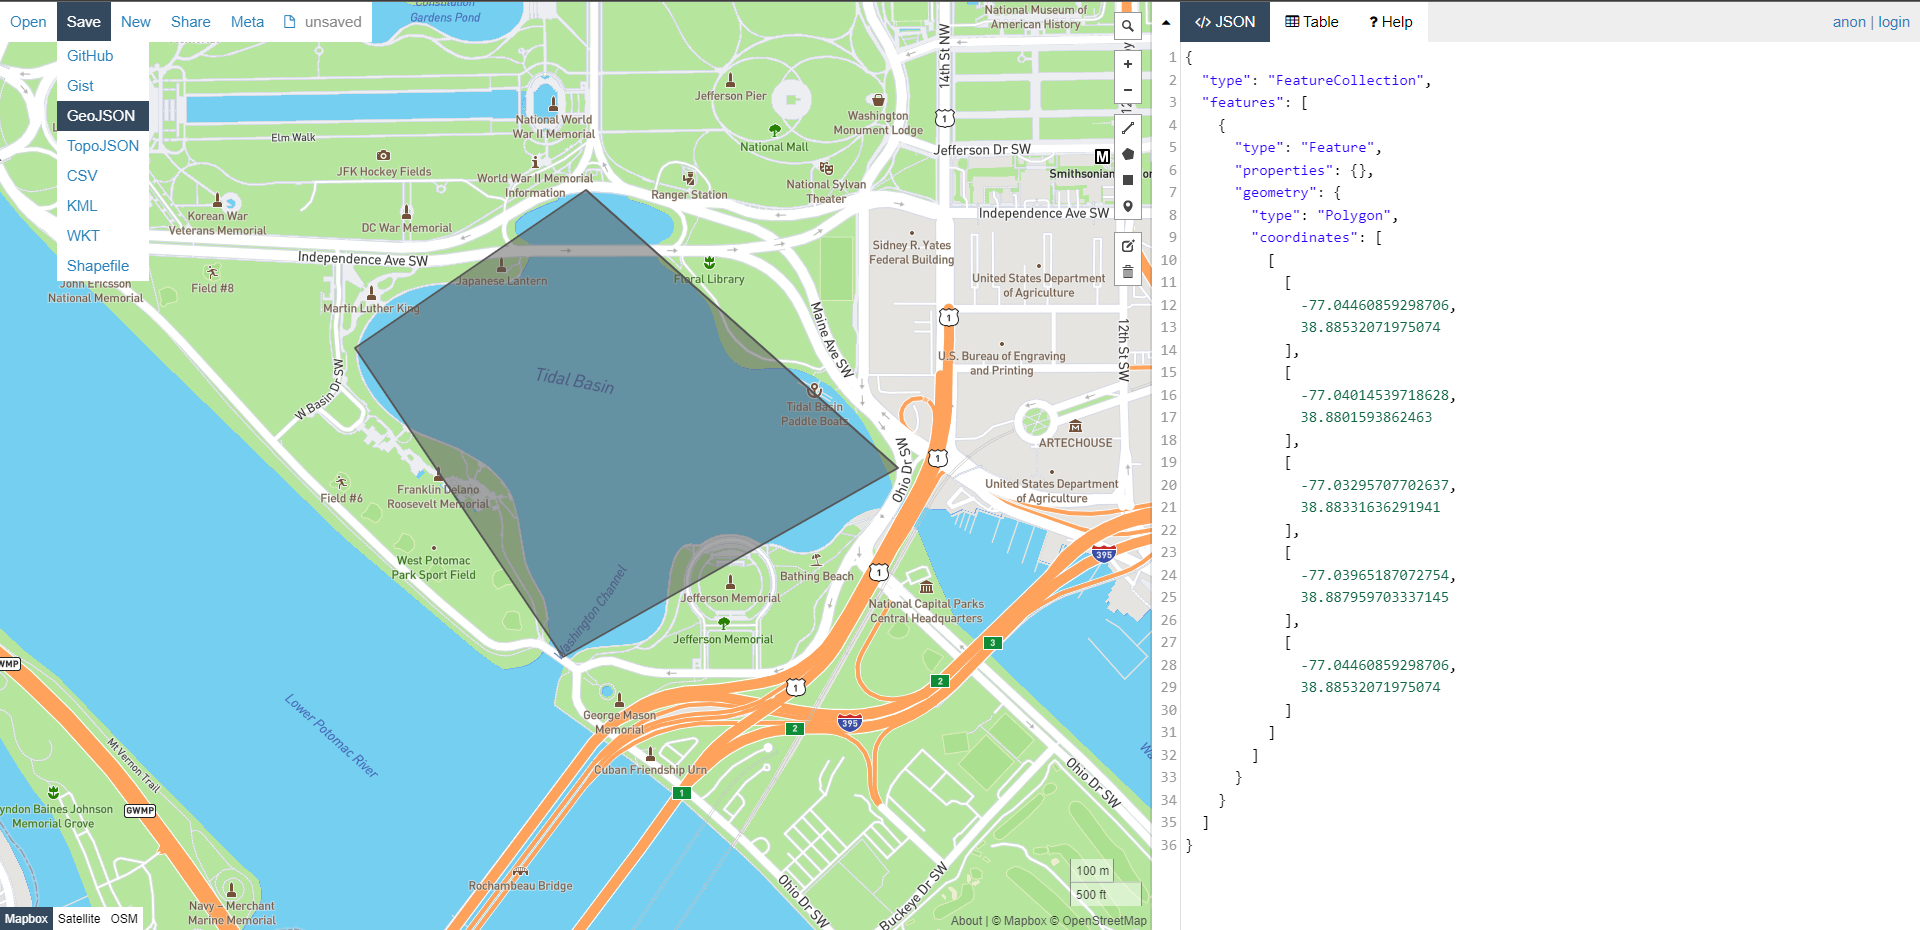
Select "Save" and then "GeoJSON" to save the completed GeoJSON boundary to disk. Your browser will prompt or otherwise alert you that the file is ready to download. Alternatively, you can copy and paste the text-only representation of the GeoJSON boundary from the right panel with the "JSON" header.
Example GeoJSON textual representation:
{
  "type": "FeatureCollection",
  "features": [
    {
      "type": "Feature",
      "properties": {},
      "geometry": {
        "type": "Polygon",
        "coordinates": [
          [
            [
              -77.04460859298706,
              38.88532071975074
            ],
            [
              -77.04014539718628,
              38.8801593862463
            ],
            [
              -77.03295707702637,
              38.88331636291941
            ],
            [
              -77.03965187072754,
              38.887959703337145
            ],
            [
              -77.04460859298706,
              38.88532071975074
            ]
          ]
        ]
      }
    }
  ]
}
Downloading A Polygon
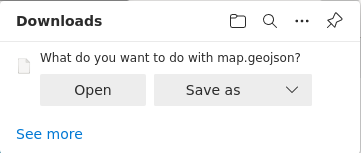
Once the GeoJSON file has been chosen for saving, the browser will prompt you to save it to disk. Choose an appropriate location where you can access it at a later time to load into WebODM.
Setting Boundary [GeoJSON] In Task Options
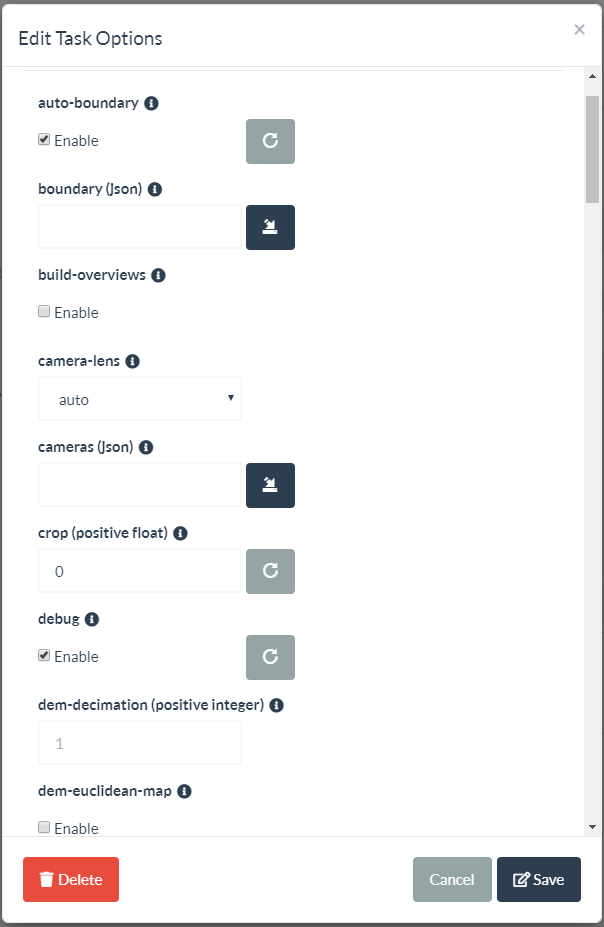
When you are editing the Task Options for your Task, you can choose to load the Boundary [GeoJSON] created above by clicking the "Load" icon. Alternatively, you can paste the textual representation of the boundary into the Boundary [GeoJSON] text box.
Boundary [GeoJSON] Loaded In Task Options
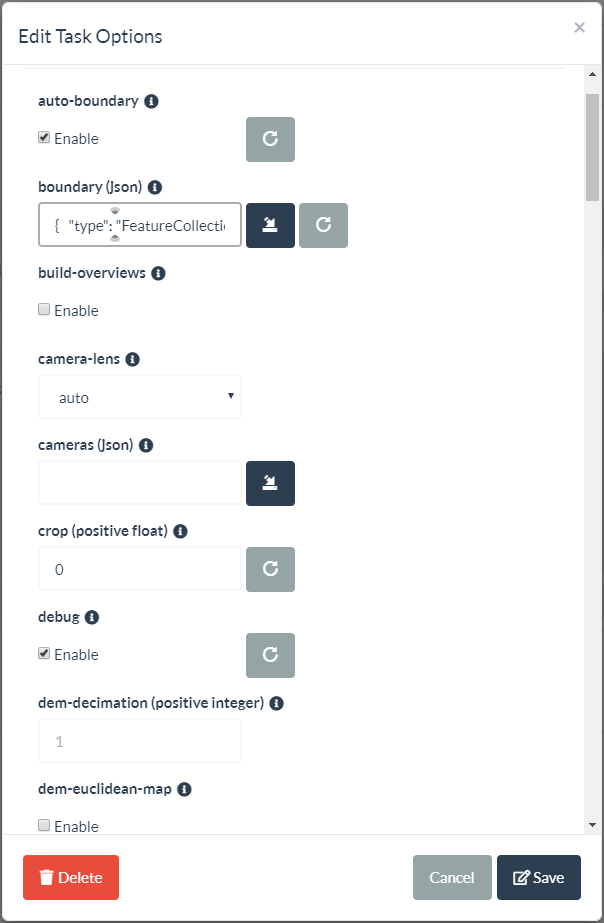
Once the Boundary [GeoJSON] has been loaded from disk or pasted from the system clipboard, you can confirm its presence by seeing the text in the text box. You can now save the Task Options to enable the Boundary [GeoJSON] for the processing Task.
QGIS
- https://qgis.org/en/site/forusers/download.html
A Free and Open Source Geographic Information System.
Creating A New Temporary Scratch Layer
![Choosing the "Create A Temporary Scratch Layer" tool to make an empty layer to create our Boundary [GeoJSON] within.](https://user-images.githubusercontent.com/19295950/145109912-9176cd94-1140-43ac-a371-96de2b874ec3.png)
You will first need a layer to create your Boundary [GeoJSON] within, so creating a New Temporary Scratch layer is a way to do this without needing to setup a file on disk first.
New Temporary Scratch Layer Geometry Type
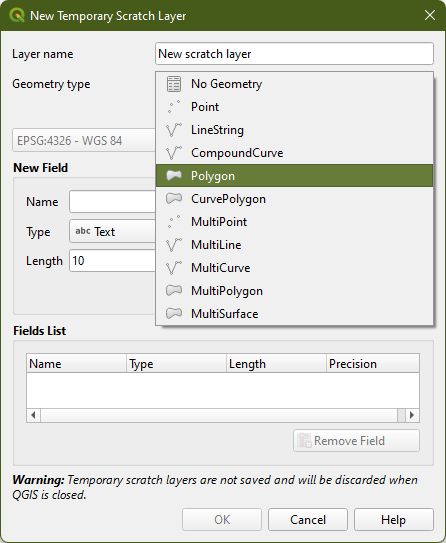
There are numerous choices of geometry types that can be represented by a given layer. OpenDroneMap is designed to work with Single Polygon, so you will choose Polygon from the Geometry Type menu.
New Temporary Scratch Layer Settings
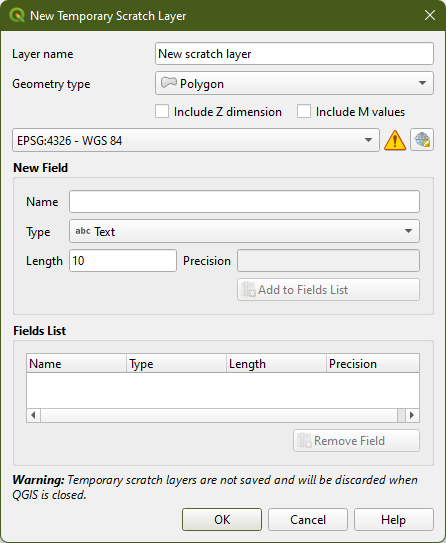
Similar to Geometry Types, there are a large number of settings and options you can adjust for a Temporary Scratch Layer. You should leave these at their pictured defaults for usage with OpenDroneMap.
Adding an Orthophoto Background
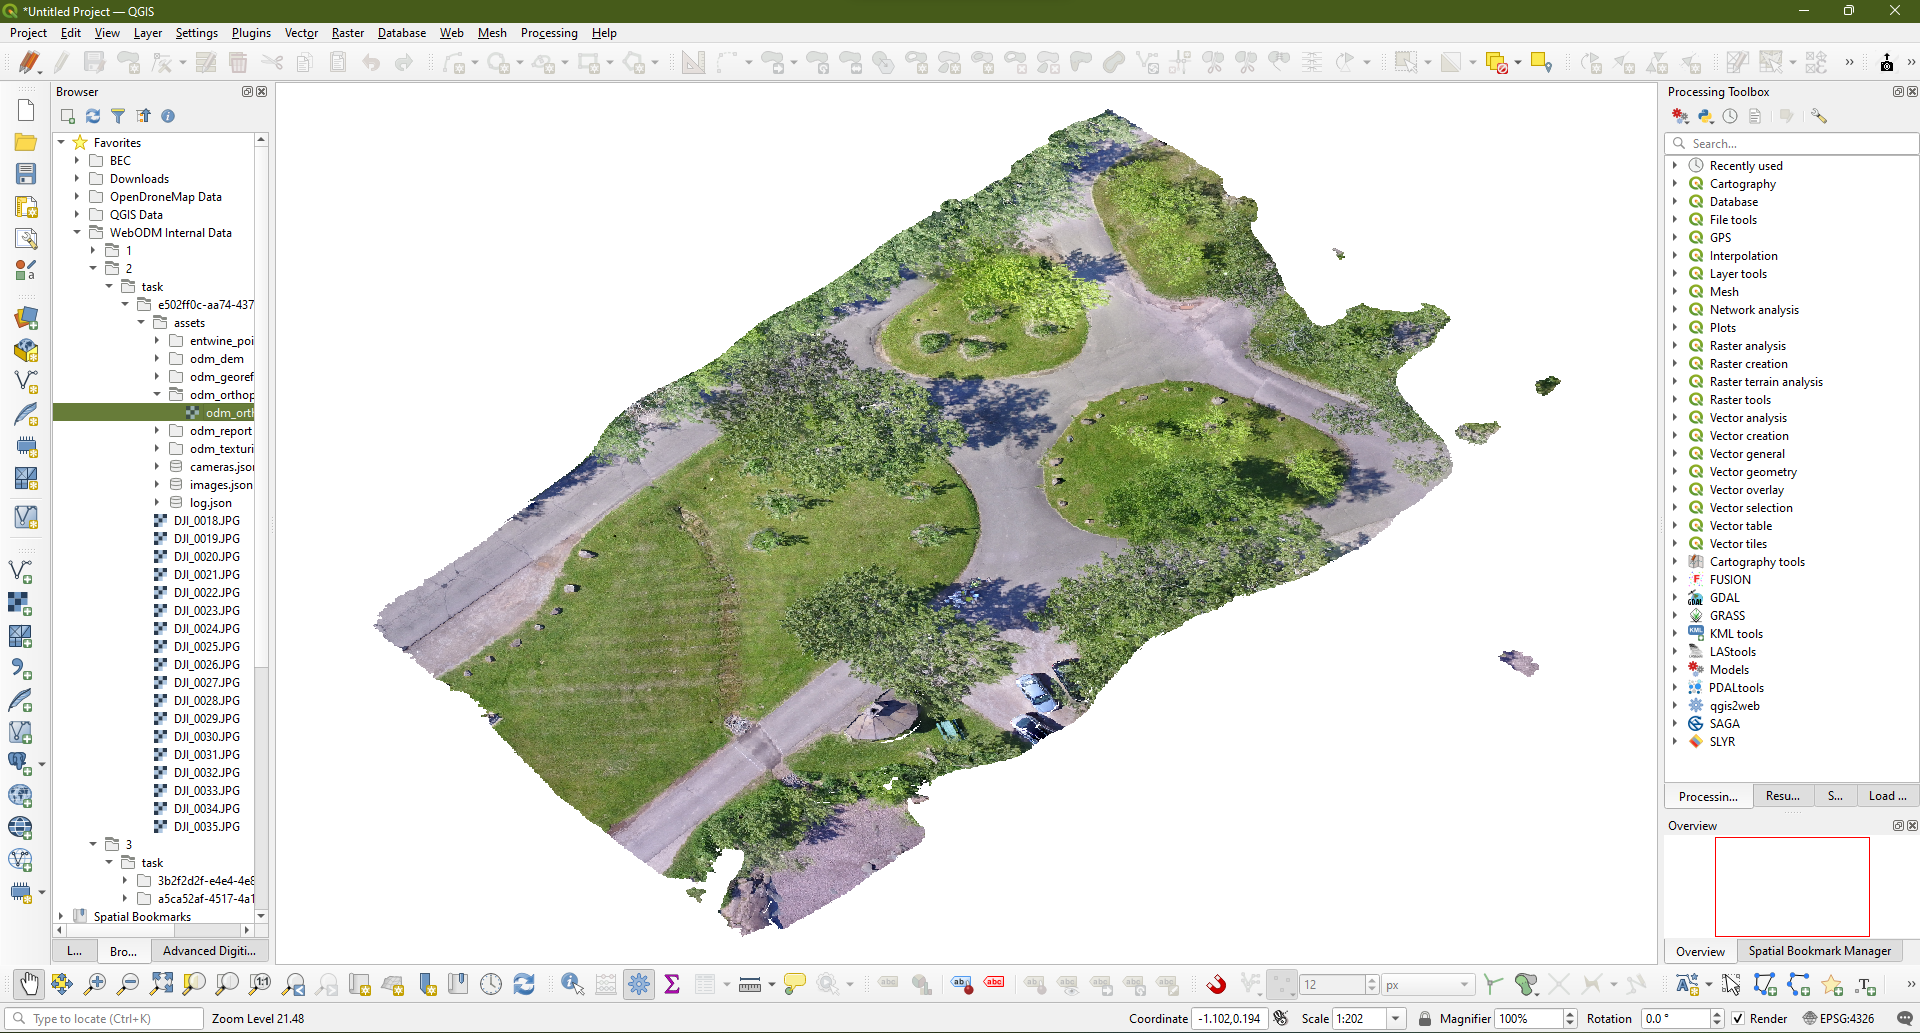
If you have run the task already without a Boundary [GeoJSON], you can load the generated Orthophoto from OpenDroneMap into QGIS to use as your basemap for creating your Boundary [GeoJSON]. This should ensure that your boundary polygon exactly matches the data in your Task, as different basemaps can have errors of 1-10m or more. If have not generated an Orthophoto for your Area Of Interest (AOI), you can use one of the various methods within QGIS to add a basemap. Just be mindful of possible differences in location, angle, skew, scale, and other registration changes that can occur between your data and a basemap provider's data.
Adding A Polyon Feature
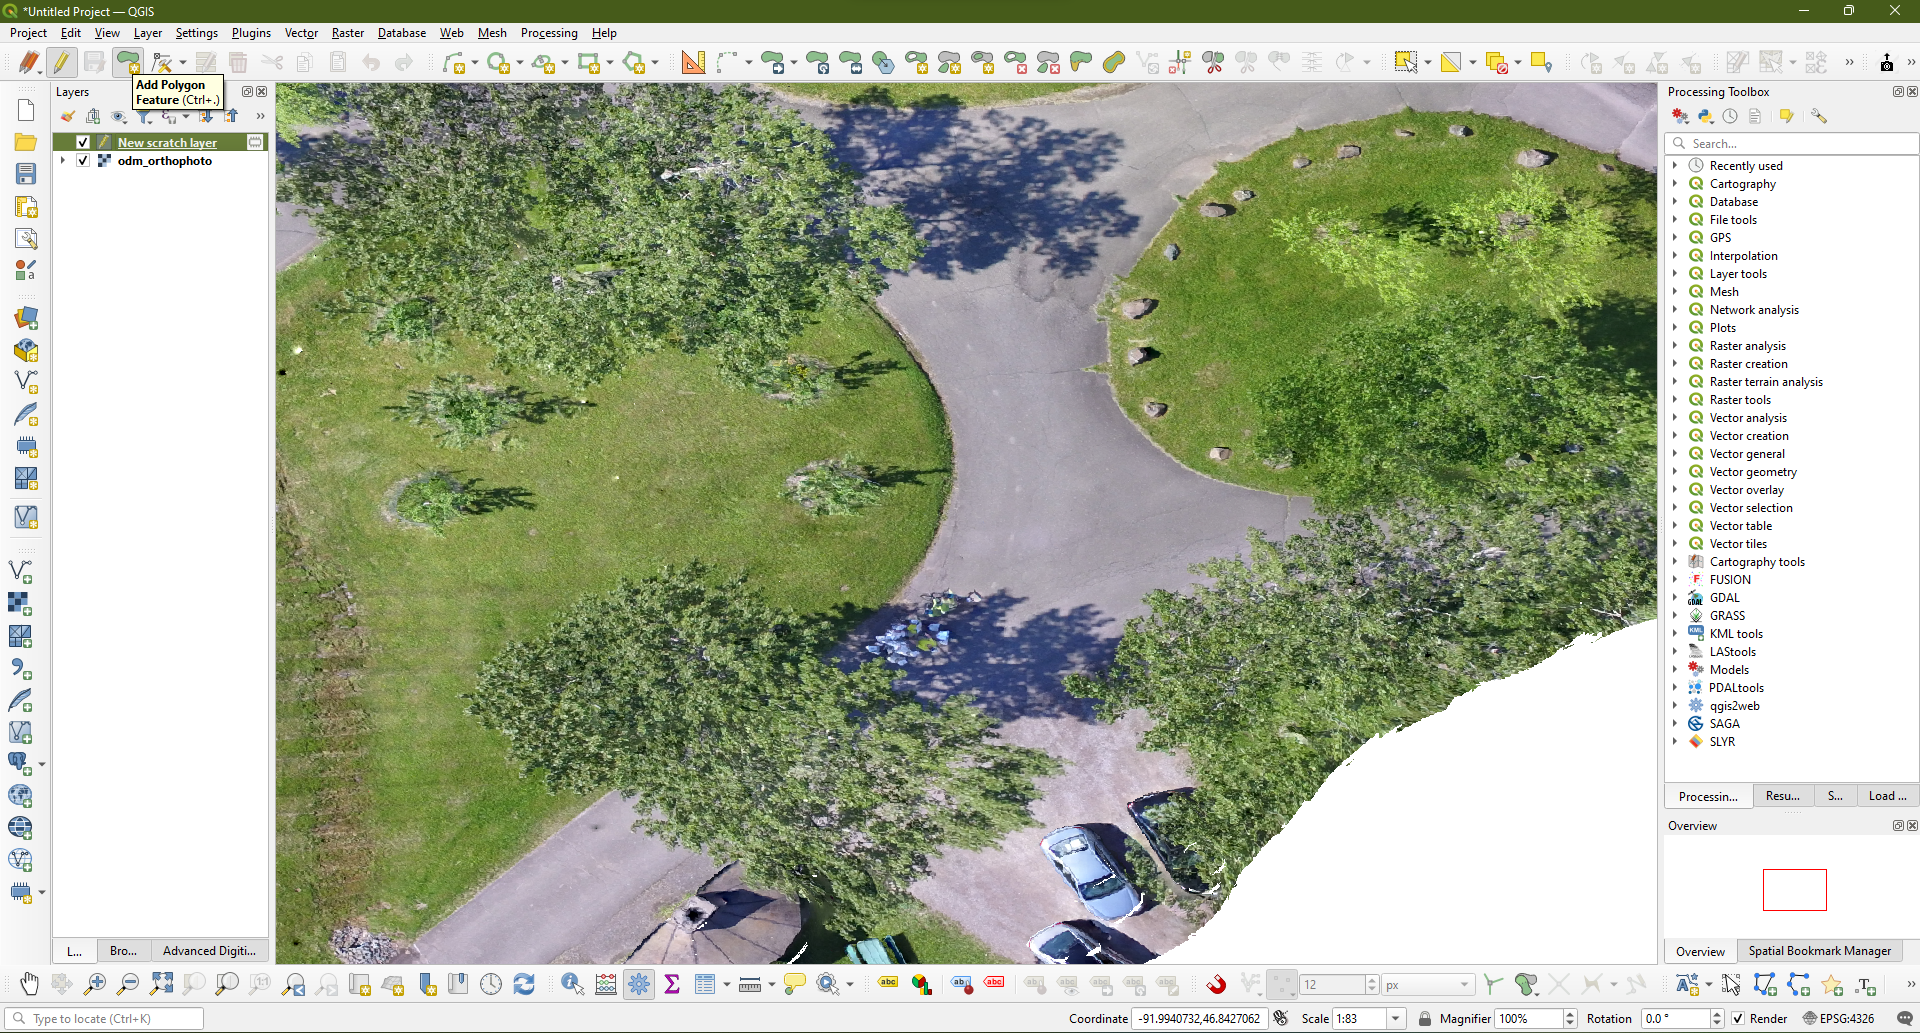
After selecting the "Add A Polygon Feature" tool, you can begin placing vertices on the map to create your boundary. To finish your polygon, you will right-click on the canvas. Similar to GeoJSON.io, a finished polygon will have a darker outline and a darker fill to indicate that it is "solid".
Toggle Editing Off
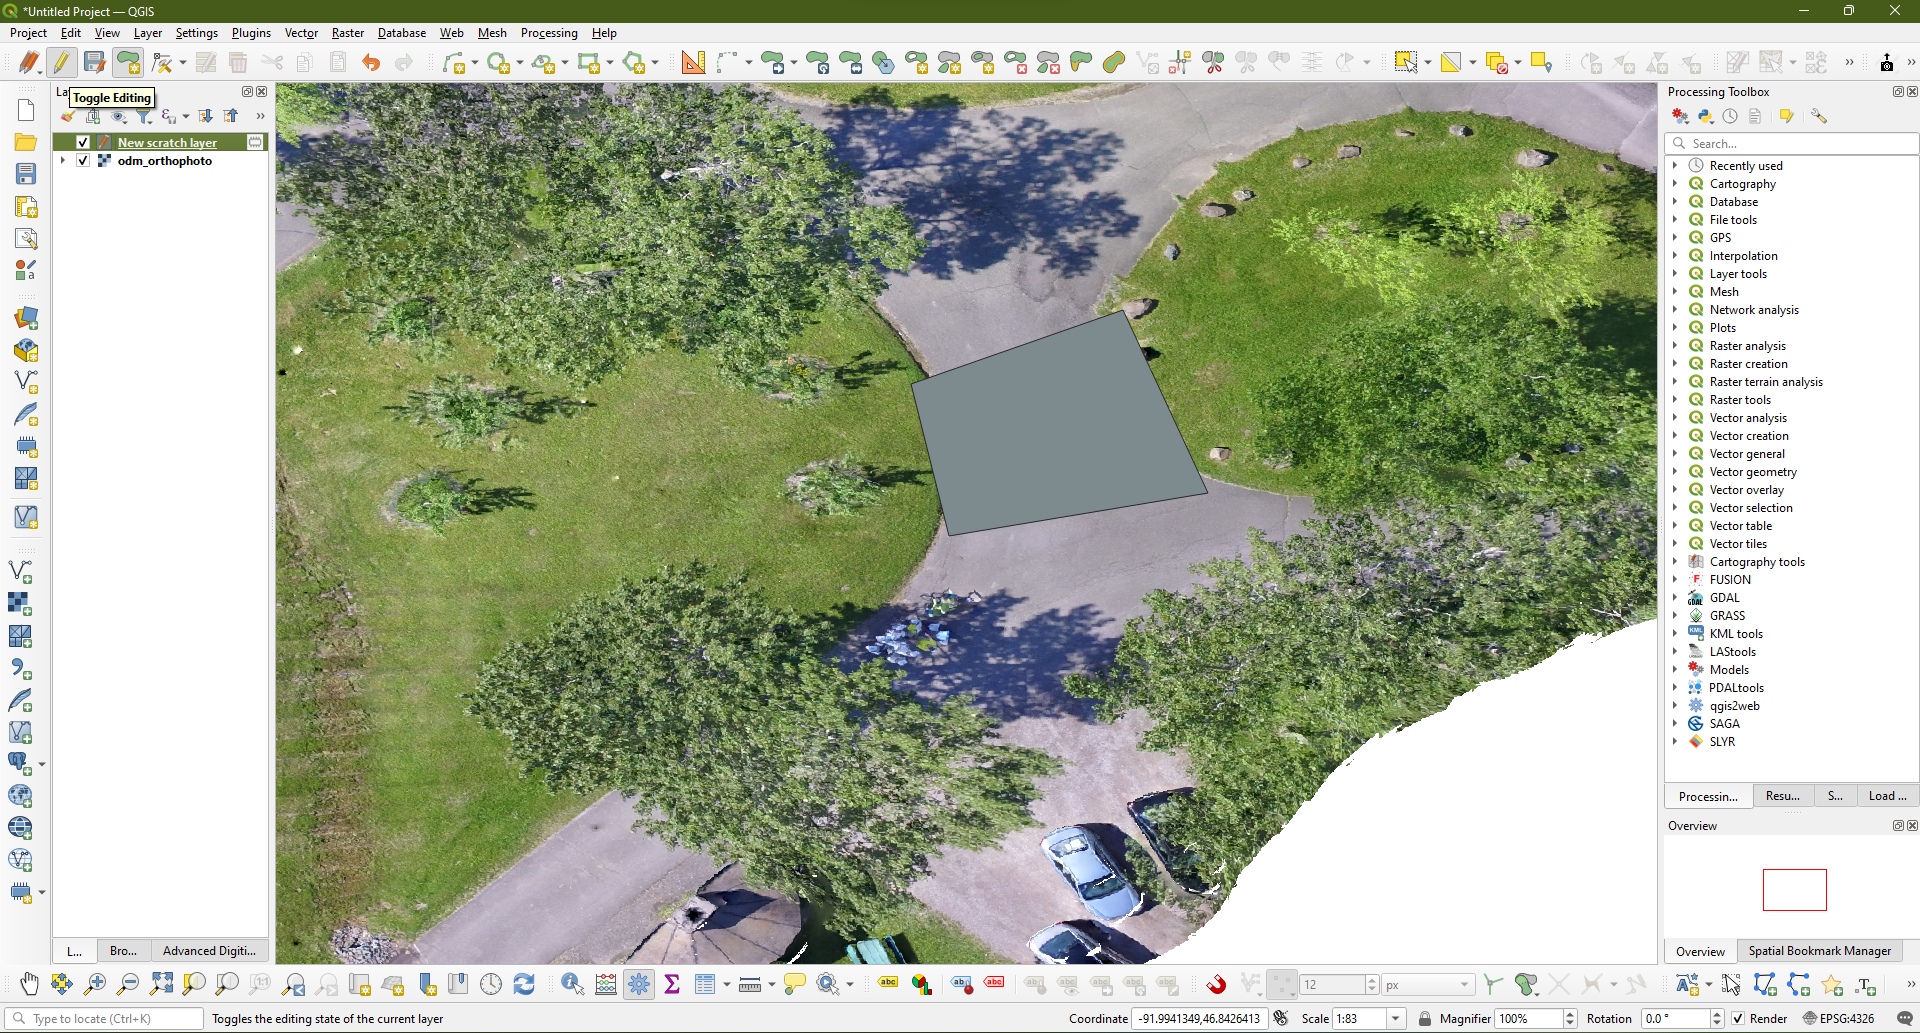
Once you are finished with your boundary polygon, you can click the "Toggle Editing" tool to accept your changes and write them out to the Temporary Scratch Layer and make the layer valid for saving/exporting to disk.
Save Changes To Temporary Scratch Layer

Clicking Save on this dialog will write the changes to the Temporary Scratch Layer and enable export/save functionality.
Export Temporary Scratch Layer Features
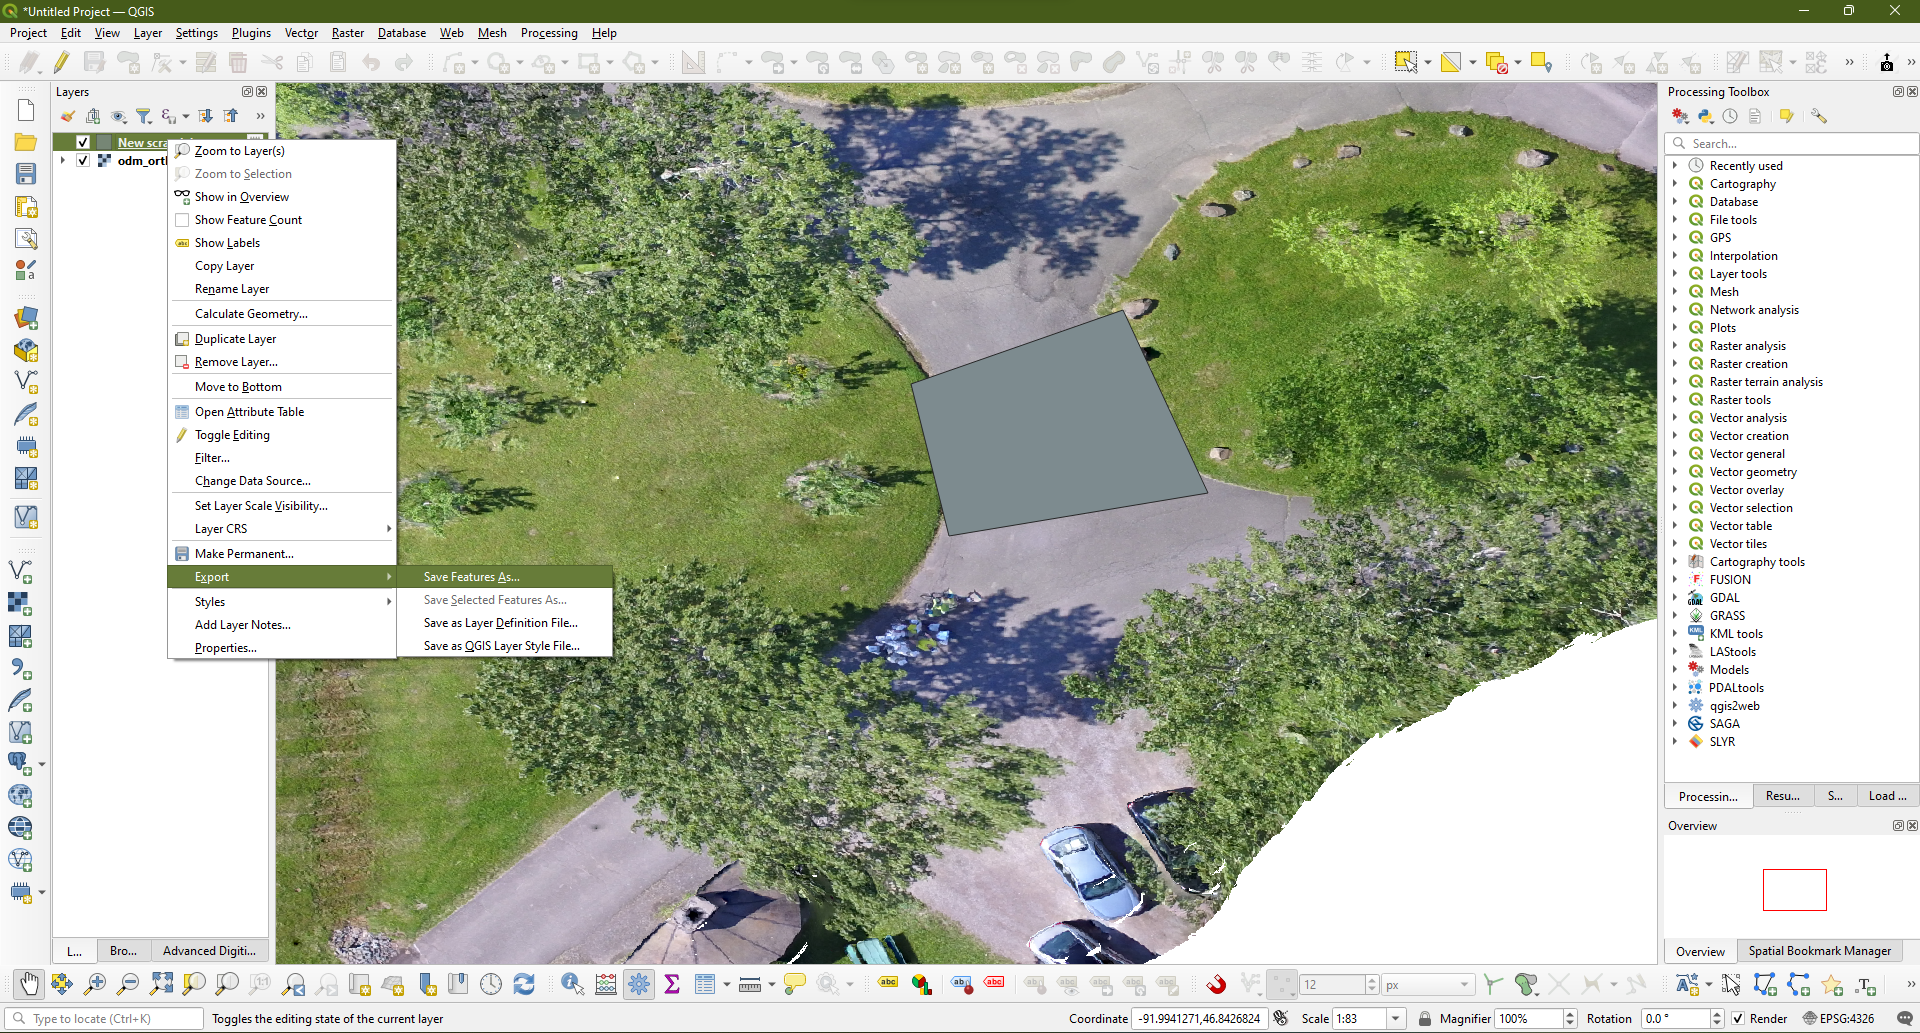
Right-click on the Temporary Scratch Layer in the Layers panel to bring up the Export menu and the Save Features As sub-menu item, selecting Save Features As. This will prompt you to choose the export format, location and file name, and settings for your layer.
Save Vector Layer As
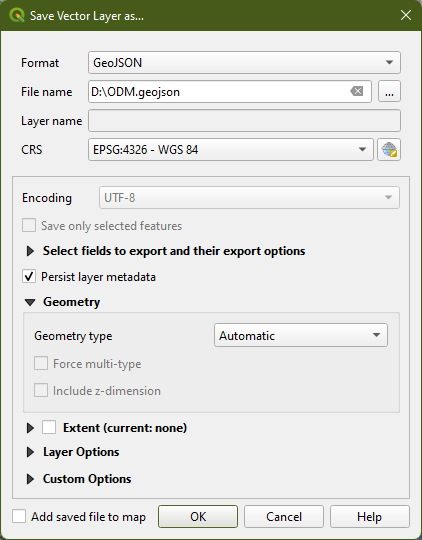
This dialog will require you to choose GeoJSON as the format, a valid filename and path for the GeoJSON to be written out to disk with, and a valid CRS. The safest CRS choice with GeoJSON is EPSG:4326, so choose that if it is not chosen by default. All other options should be left as default and do not apply for OpenDroneMap usage.
Example Images
True: --boundary [GeoJSON] - Point Cloud
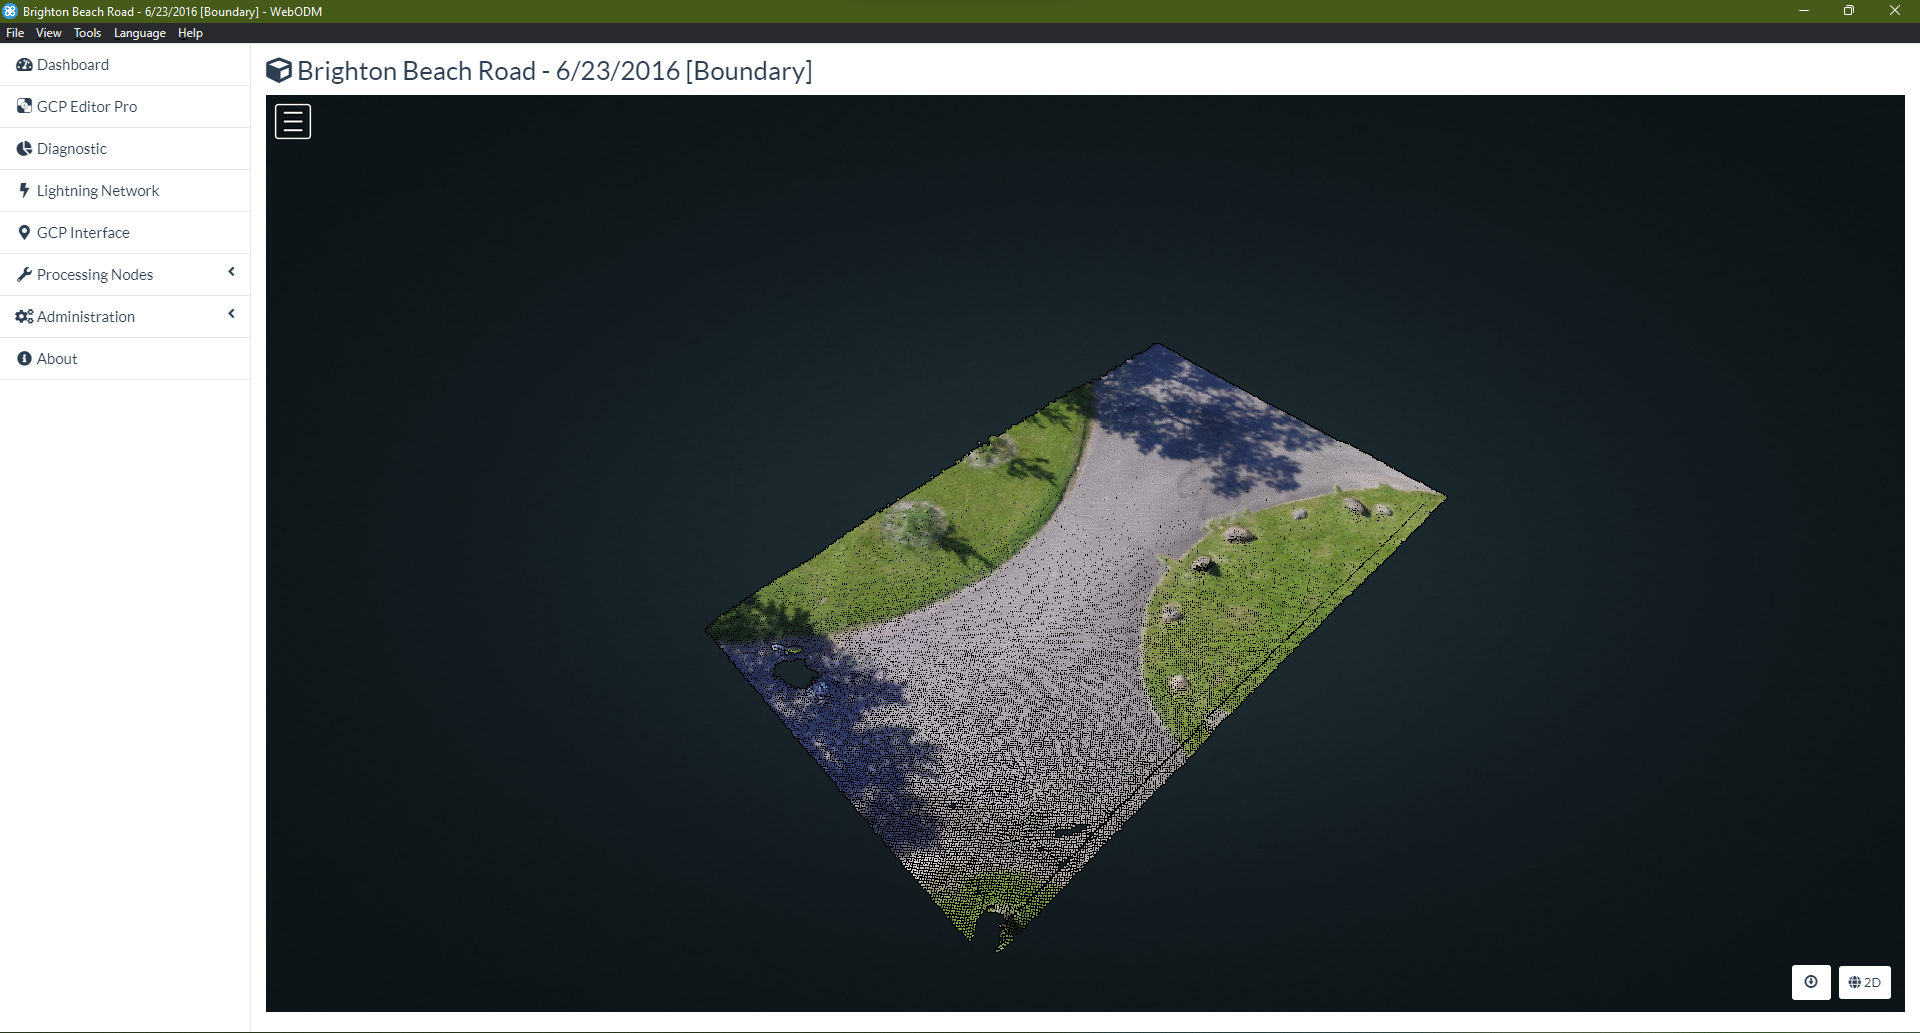
The WebODM 3D View shows the modified extent of the reconstruction Point Cloud, bounded by the GeoJSON proivded to the --boundary option.
True: --boundary [GeoJSON] - Orthophoto
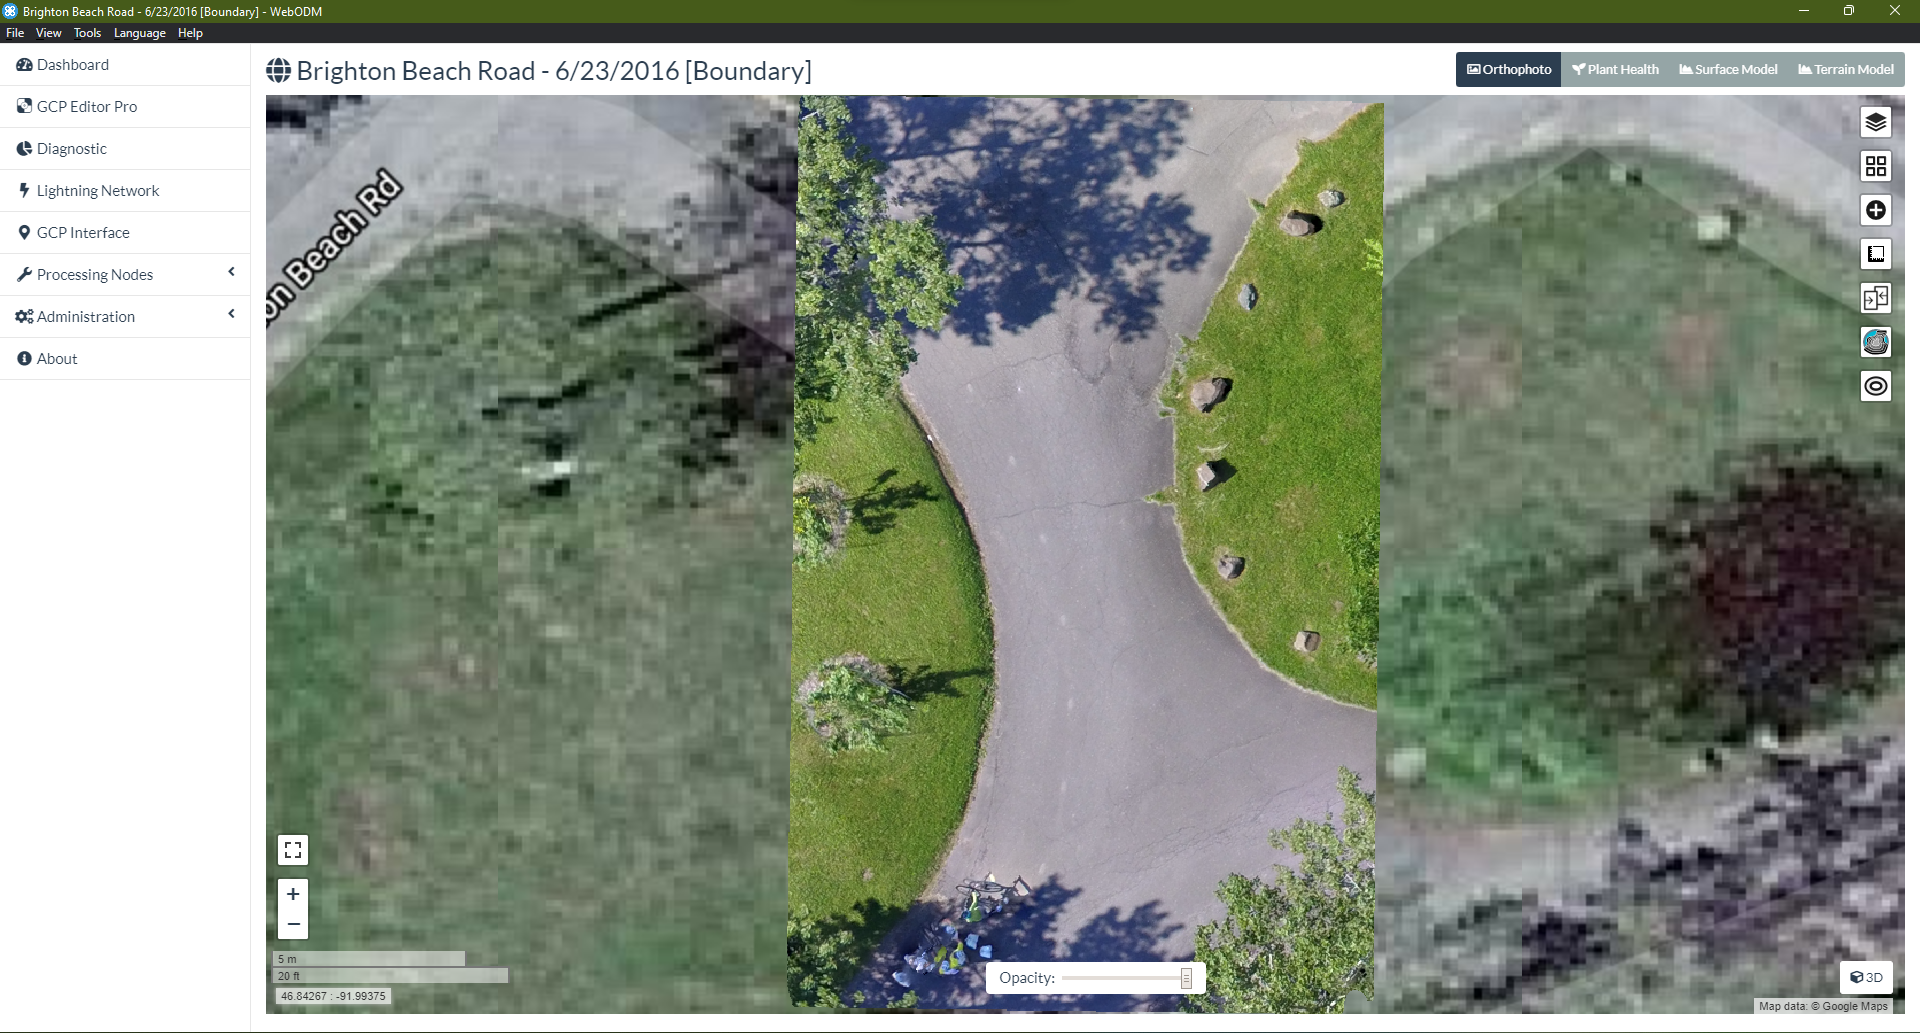
The WebODM 3D View shows the modified extent of the reconstruction Orthophoto, bounded by the GeoJSON proivded to the --boundary option.
True: --boundary [GeoJSON] - Digital Elevation Model
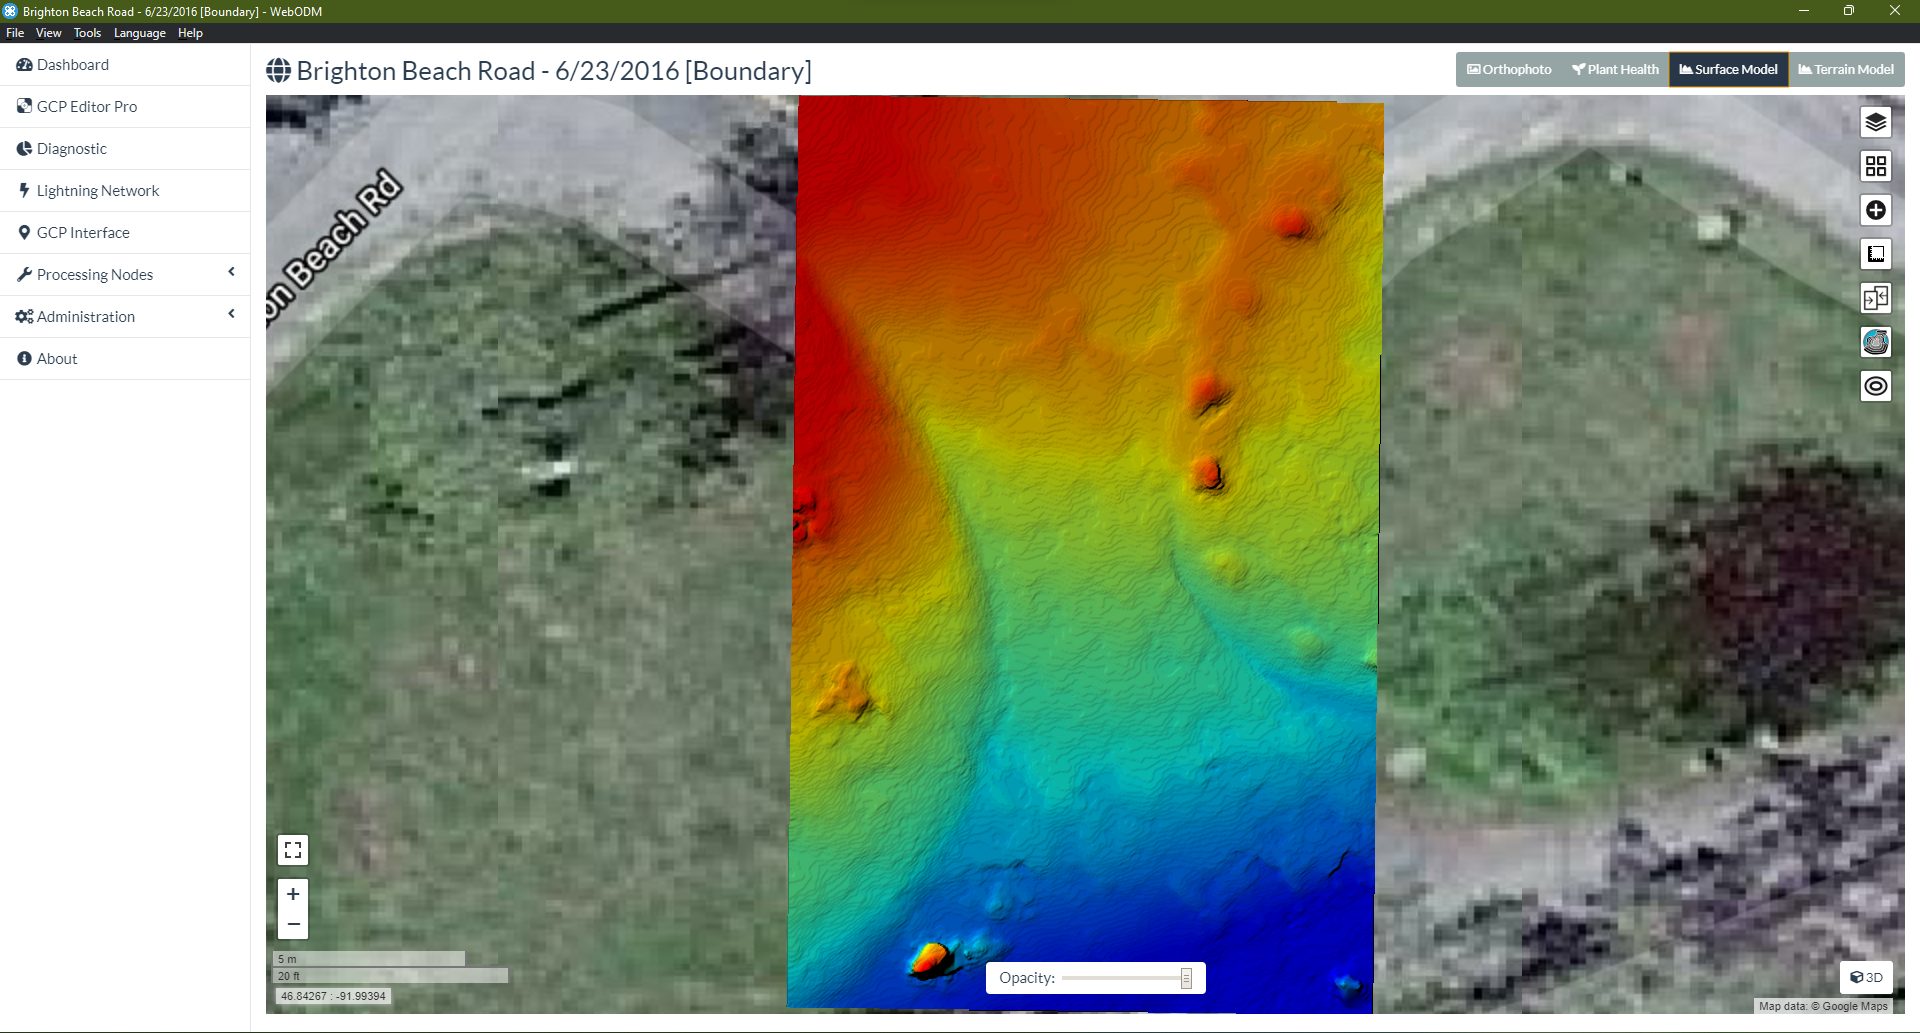
The WebODM 3D View shows the modified extent of the reconstruction Digital Elevation Model, bounded by the GeoJSON proivded to the --boundary option.
True: --boundary [GeoJSON] - 3D Model/Textured Mesh
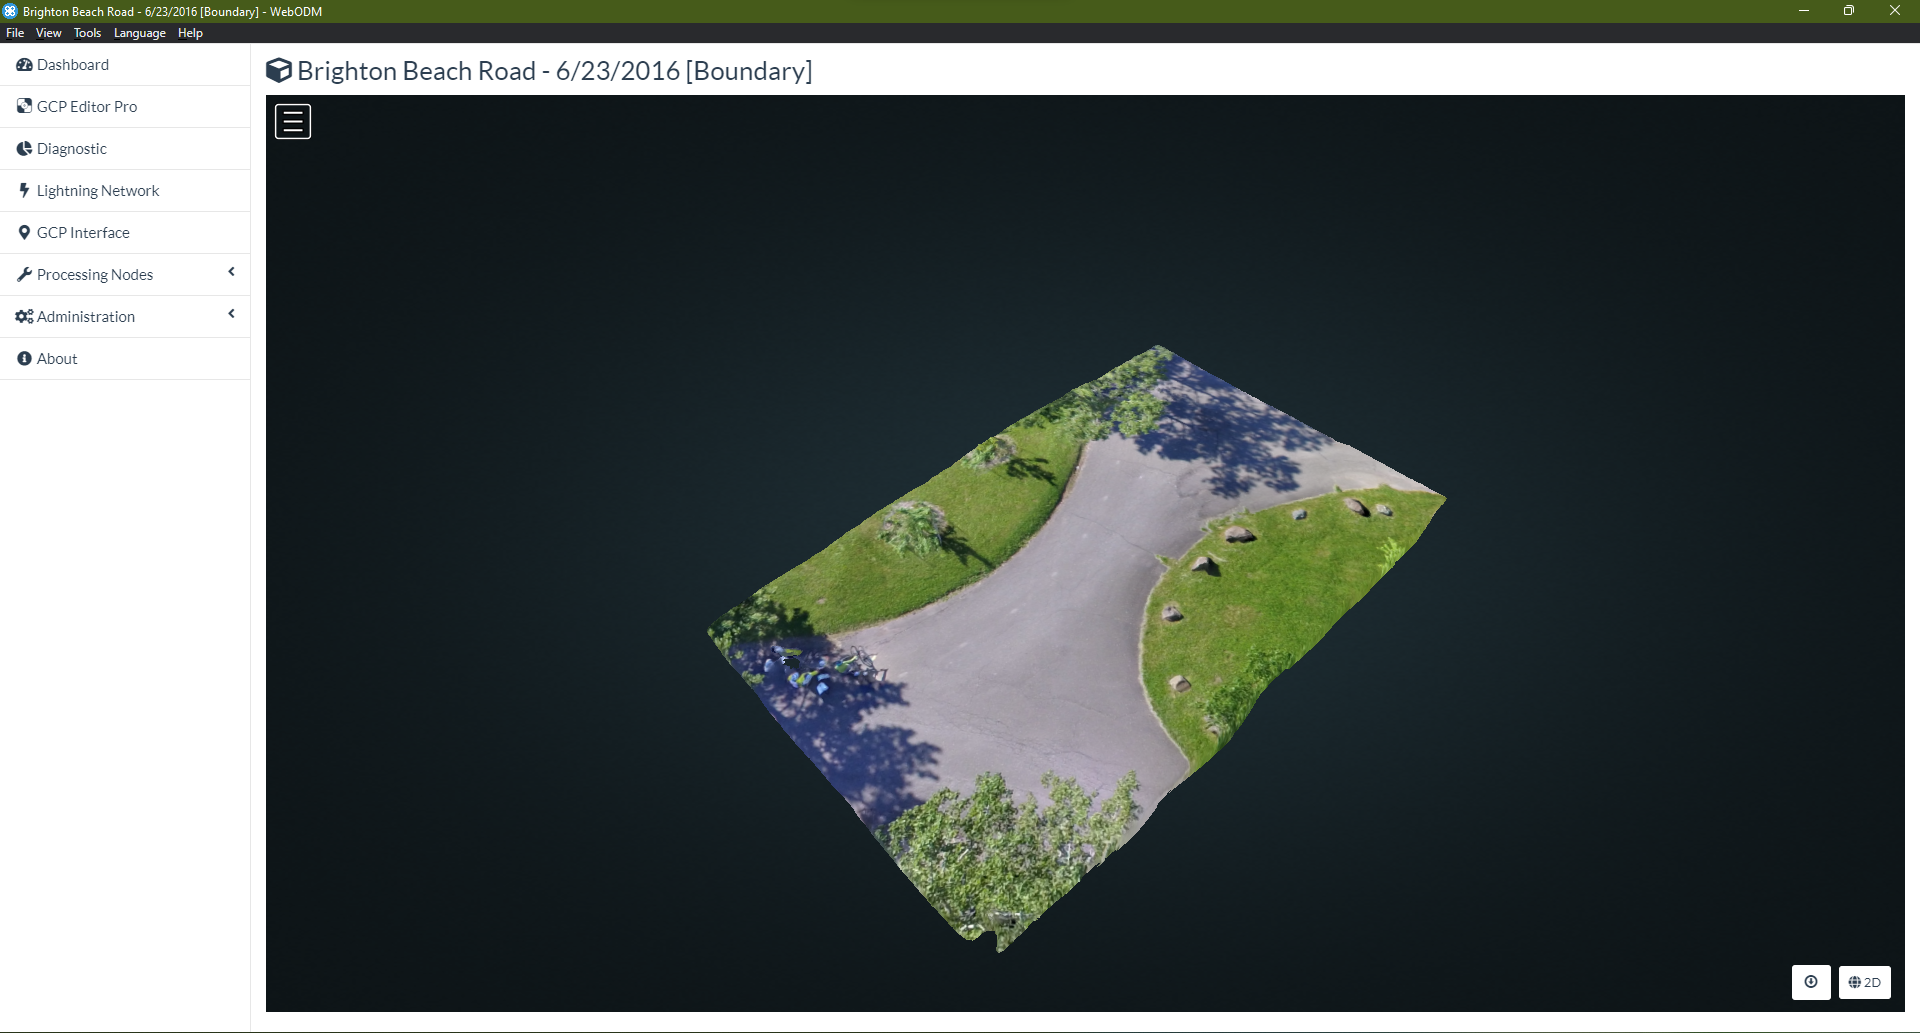
The WebODM 3D View shows the modified extent of the reconstruction 3D Model/Textured Mesh, bounded by the GeoJSON proivded to the --boundary option.
False: null
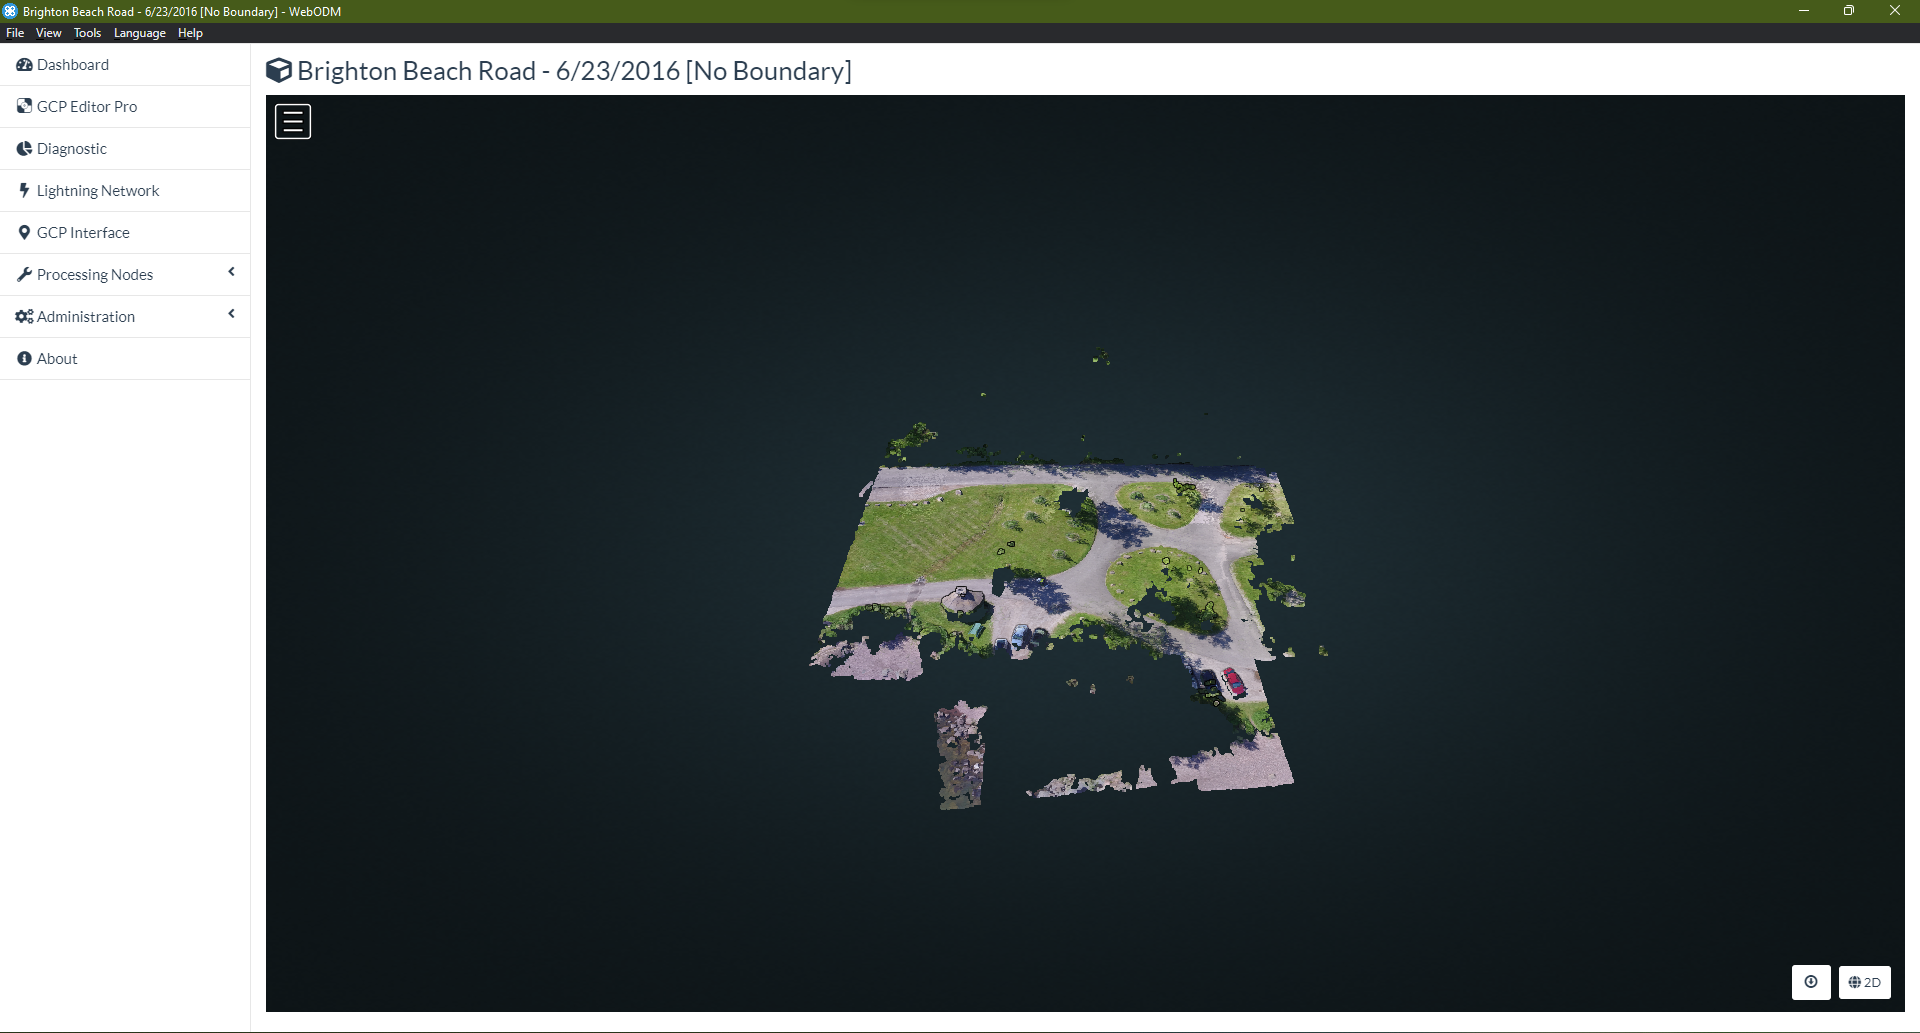
The WebODM 3D View shows the full extent of the recosntruction. Compared to the --boundary reconstruction above, one can see that the full reconstruction area is much larger and includes many features outside of the Area Of Interest used to generate the GeoJSON.
Learn to edit and help improve this page!